“That’s a valiant flea that dares eat his breakfast on the lip of a lion.” – William Shakespeare

I’ve been busy, boy have I ever been busy, as such I haven’t been cooking as much as I’ve wanted to. That also means I haven’t been blogging at all, really. My back took me out of commission for several months and I lost motivation to do a lot of things. However, after several months of chiropractor trips twice a week, I am slowly getting back into the swing of things.

Cooking has always been a passion and a bit of a mental vacation for me and in that sense I haven’t been taking enough trips lately. I have taken a few and I’ll be sharing them over the next few days, hopefully, and then will be trying out some new ones to impart.

This was a recipe that I made for Johnathan & Holly Gregorash’s wedding shower and was a big enough hit that I was immediately, and politely, hounded for the recipe. I kept saying I would post it on here and send the link and time kept slipping away, with work and self-pity about my back I didn’t have the Get Up And Go to pull it together. Now I do!


Breakfast Casserole


Das Zutaten (ingredients)

  • 8-12 eggs (depending on number partaking)
  • 1 med onion, diced
  • 6-8 mushrooms, sliced
  • 1 coloured pepper (I use red purely for esthetics)
  • enough strips of chicken bacon to layer across the bottom
  • whichever herbs and spices you like to season your eggs with (I use sea salt & garlic with a bit of dill and cracked black pepper
  • 2 generous handfuls of Daiya Mozzarella Style Shreds
  • 2-3 slices of sourdough bread cubed.
  • drizzle of olive oil
  • coconut oil

Bring a pan up to medium heat, toss in a bit of coconut oil and allow it to melt and add in your onions to get some colour. Once the onions have cooked a bit, the mushrooms go in until everything is a nice golden. Meanwhile bring the oven to 375 degrees and, on a baking sheet, lay out the cubed sourdough with a drizzle of olive oil and bake until crisp (roughly 5-7 minutes.) While the bread is in the oven you may want to put the chicken bacon on a pan and bake it as well. It will take longer than your newly formed croutons but that gives you a reason to keep the oven on until your casserole goes in. Your veggies should be done by now so you can set them aside and either leave them in the pan off the heat or place them in a bowl.

The egg bit is rather straight forward, crack the lot of them into a large bowl, add just a titch of water and your seasoning and whisk it away to the ideal mixture, then add the pan-fried veggies and cheese and mix further. Flash back to the chicken bacon that is now just about perfect, take it out and layer the bottom of your dish of choice. Pour your egg mixture over the bacon and sprinkle on the sourdough croutons, add any last-minute garnish you deem worthy of breakfast (occasionally, green onions make the grade.) Then it is into the oven for roughly 30 minutes or until the egg is cooked through.

This is a great dish to make at the beginning of the week so you can fry (or microwave) a few pieces for breakfast without all that early morning prep time. It’s also a good option for pot lucks.

Advertisement

“Not to sound too much like Christopher Guest in ‘Waiting for Guffman,’ but on Thanksgiving you’re putting on a show!” – Ted Allen

I’ve been away for a while, working on two other sites which took my spare time away from my own. But just because I’ve been away from the keyboard doesn’t mean I’ve been out of the kitchen. This past weekend, Thanksgiving, I created a dish, somewhat by fluke, that has become a side dish staple.

We cooked our turkey two days in advance and were having people over for dinner on Friday night (you guessed it, our T-Day was Sunday), but since I have so many food issues I couldn’t eat what was being served. So I started to make a mini turkey dinner for myself, which meant I needed some veggies. Rather than dirty several pots, I put the potatoes in the bottom and tossed a veggie steamer on top for the carrots. Originally my plan was to do up a batch of Make Ahead Potatoes, but the carrots gave me a better idea.

Ingredients

  • 4-5 small to medium sized potatoes (peel to preference)
  • 3-4 good sized carrots peeled
  • curry (to preference)
  • Daiya Dairy Free Cheese
  • Tofutti Sour Cream
  • margarine

I made this twice over the weekend, once with steamed carrots, the second time was done with carrots that were sliced into dollars and cooked in a pot all their own. Both worked quite well, the steamed, of course, mashed better and the dollars kept their form. How you cook the carrots depends on whether you want to have a completely smooth consistency or a more chunked, rustic, feel. I do prefer the latter and, as such, leave the skin on the potato and mash rather than use a hand mixer.

But I’m getting ahead of myself. I’ll give the recipe with dollared carrots and then, if you’d rather, all you need to do is steam the carrots and use a hand mixer to marry it all together before tossing it in the oven.

Peel the carrots, halve or quarter the potato according to size and slice the carrots into dollars. toss both in separate pots to cook. Once the veggies are done, put in a large bowl, add in some margarine to make the mashing easier and have at it. After you get a good mash on the potatoes and carrots, add a couple spoonfuls of the sour cream, your preferred amount of curry and a handful of the Daiya Cheese. When the mix is mashed to your desired consistency, transfer to an 8×8 pan, flatten it out, layer on some more Daiya, and put in the oven @ 350 for 25-30 minutes.

Uploaded from the Photobucket iPhone App

While it does LOOK like the Make Ahead Potatoes, it tastes completely different and an excellent addition to your dinner table.

“I alone cannot change the world, but I can cast a stone across the waters to create many ripples.” – Mother Teresa

First off, I want to thank everyone who came to visit me last night at my booth during Afterglow. I had many great conversations with the lot of you and it was great to be able to share what I know about living dairy free, and very encouraging to have so many people excited to try my recipes.

Those who attended last night’s event got a bit of a preview that you folks have not yet been privy to, a few days ago I made Panko Crusted Stuffed Meatballs and posted a picture on both Facebook and Twitter. That resulted in several people asking for the recipe and I decided to include it in those featured at my booth.

Uploaded from the Photobucket iPhone App

Since some of you were geographically unable to attend, and others either couldn’t make it out or the rain killed their copy of the recipe, I’ve uploaded a PDF version of the pamphlet I handed out with all three recipes included. Simply click the link and you’ll have access to them in all their glory. Tony’s Recipes – Afterglow

I look forward to hearing feedback from those who give these recipes a go and, as always, if you’d like to send me an e-mail with pictures of your creation and a write up on what you did, I would love to post them on here. My goal for this blog is to replicate the atmosphere found when sitting with a group of friends in the kitchen, swapping recipes.

Happy Cooking!

Always do your best. What you plant now, you will harvest later. – Og Mandino

Back in action!

As I mentioned previously, the past few weeks have been incredibly hot and humid here, so I’ve had to stay away from the stove as much as possible. Otherwise I would have overheated the whole house, and I didn’t want to have to deal with that.

This meant I was very limited as to my choices, especially since take out isn’t an option. I decided to break out the slow cooker, which still kicks off a fair amount of heat but my system worked out quite well. The best way to beat the heat is to do all your prep, load the slow cooker, then find the coolest place in your house and plug it in. Since you don’t need to do much other than leave it be, and occasionally twisting a knob or two it doesn’t need to be on the kitchen. Keep it somewhere cool, and let the smell waft through your house.

We got a good rain storm, so I can use the stove again, but I wanted to pass on my personal favorite of the recipes I came up with.

Here’s What You Need

  • 1.5 lb ground poultry
  • 1 medium sized zucchini
  • 6-7 mushrooms
  • 1-2 scallions (depending on size)
  • 1 orange pepper
  • cayenne
  • sea salt & herbs
  • 1 pkg brown rice pasta (shape to preference)
  • 2-3 green onions
  • tomato sauce (2 cans)
  • Daiya Dairy Free Cheese

This can become a vegetarian dish very simply, just ditch the poultry & double up on the veg. =)

There is still some stove work required, but not much.

Put some olive oil in a pan big enough to cook all the poultry, and dice all the veggies. Set the green onion aside, and toss the rest in the pan once the meat starts to change colour. Season everything as you see fit (cayenne + sea salt & herbs, for me.) Keep it at a medium heat and let it all cook down, until the meat is browned slightly.

At the same time, bring a pot of water to a boil, put in a few drips of olive oil and the package of pasta.

When the ingredients in the pan finish cooking, put them in the slow cooker, and when the pasta is done, drain it and add that in too. At this point I added in a healthy amount of cheese and then mixed everything together with the tomato sauce. Topped it off with a layer of cheese, cranked the slow cooker to high and put it in the coolest place in your house for 4-5 hours. Then toss on the green onions, and leave it for another hour or two.

Now is about the time to carry this amazing culinary pot pourri back to the kitchen and serve it up!

Uploaded from the Photobucket iPhone App

I’m about as tired as my little one, so I’m calling this blog sufficiently entried!

Uploaded from the Photobucket iPhone App

Failure is success if we learn from it. – Malcolm Forbes

My mother always made the best Mac & Cheese growing up, and I would request it regularly. But when you develop both IBS and an intolerance to dairy, your diet gets tweaked ever so slightly.

I can no longer eat pasta, one of the joys of IBS is everyone reacts to it differently and the triggers are different for everyone. I have no problems with bread, or wheat, or flour, gluten is not my enemy. But for some reason Pasta just does not agree with me. So I just considered Mac & Cheese to be a write off. I figured I had eaten my last one long ago and didn’t even savour it because I had no idea it was my last hurrah.

Over time I found some pasta alternatives, there’s brown rice pasta, corn pasta, rice vermicelli, udon noodles, and one made of bean sprouts and peas that is white raw, but cooks clear. When you’re not warned about something like that it can catch you off guard pretty quick!

Finding an alternative to run of the mill pasta was easy, as the first one I tried didn’t taste like cardboard. I wasn’t so lucky with an alternative to cheese.

I tried many different types of dairy free cheese and none of them tasted anywhere close, some claimed they “melted” but they didn’t. They ended up with a film over top and just molten particle board tasting lava underneath. I had almost given up, I thought I had tried them all, with no success, but then I noticed Daiya for the first time as I passed by it in the deli. It wasn’t with the other dairy free or vegan cheeses, but around the corner with the “normal” cheese, so I hadn’t paid it much attention. I saw those magic “Dairy Free” words, and tossed it in the cart. When I got home I also noticed the claim that it “melts and stretches”, but took it with a grain of salt. Fast forward to a year or two later, and there is always at least two bags of the shredded in my fridge. It is the best alternative I have found, it DOES melt, it DOES stretch, & most of all IT TASTES LIKE CHEESE!

To me it’s a wonder product, it was a game changer for me, it was with this product that I realized being dairy free wasn’t all that horrible, there were work arounds and they tasted great.

It’s because of Daiya cheese that I’ve been able to make a lot of the recipes that are on this blog, including the one I’m about to share.

I’ve obviously had to tweak the recipe a bit as far as ingredients go, I’ve also added some stuff too because I can never leave well enough alone, this is Mac & Cheese 2.0

The zucchini is something that, under normal circumstances, I wouldn’t have in my fridge. However, the always fantastic Susie Jimenez sent out a battle cry to pick up a new vegetable, you normally wouldn’t cook with, and incorporate it into your night’s meal. If it weren’t for her, I wouldn’t have figured out just how awesome zucchini is and how much it added to this recipe. I suggest you all give her a follow on Twitter, she’s got some great ideas!

Side Note: If you want to make this dish vegan, all you have to do is omit the bread crumbs and chicken, also use the vegan margarine that Becel has.

The Goods

  • 8×8 pan
  • 1 3/4 cups macaroni (brown rice pasta)
  • 2 tsp margarine (olive oil or vegan becel)
  • 2 cups almond milk
  • 1/2 tsp salt
  • pinch of pepper
  • bread crumbs (omit for vegan)
  • Daiya Dairy Free Mozzarella or Cheddar style shreds
  • 1 small zucchini
  • 4-5 mushrooms
  • 1/2 onion
  • 1-2 small chicken breasts (omit for vegan)
  • curry powder
  • sea salt & herbs

I tend to cook the chicken in the afternoon so that its cooked when I’m prepared to get everything else ready. Just very simply chop it up into chunks, season it lightly as you wish, over the dish in tinfoil and cook it at 350 for 30 minutes.

Put the pasta in a pot with some salt, water and a little bit of olive oil to keep it from clumping.

Slice up the onion, zucchini, and mushrooms and toss them in a frying pan with some olive oil and some Sea Salt & Herbs and once the veggies start to get some colour, toss in the chucks of chicken. Keep it at a low-medium temperature and let it cook, while keeping an eye on it, and get everything else ready.

In a small microwavable bowl, melt the margarine then, in a larger bowl, whisk it together with the flour, almond milk, salt, pepper, and curry. Now the curry is a recent addition, and we loved it! For those who aren’t familiar with it, you don’t need a lot of curry for big flavour, so be careful not to make it too spicy. We use a yellow curry and keep adding it in bit by bit to avoid a mishap.

The veggies and chicken will be done before your pasta, so feel free to transfer them from the stove to the 8×8 pan. Once the pasta is cooked, drain it, rinse it off, and drain a second time. Then add it into the pan with your other goodies. This is where the cheese comes into play. I didn’t put an amount on the list of ingredients for the simple fact that it all comes down to preference, we like it quite cheesy. Put your desired amount of cheese and mix it all together, and pour in your liquid. After everything is in the pan, give it another mix to make sure everything is coated, sprinkle on a layer of bread crumbs and some more cheese and into the oven it goes @ 350 for 30 minutes. The cheese and bread crumbs crisp up and everything else cooks perfectly to the point where it all melts in your mouth.

Uploaded from the Photobucket iPhone App

Once again, if you try this, please send me an e-mail with pictures and any revamps to the recipe you’ve made. My next entry will be Barbara‘s take on the Breakfast Pizza =)

Do not go where the path may lead, go instead where there is no path and leave a trail. – Ralph Waldo Emerson

So, I was watching Chuck’s Day Off on the Food Network and he was making this really yummy looking spinach dip. Going on about the different cheeses that go into it, and the beer base and I slowly started to check out mentally. A beer based spinach dip sounded great, but when you’re lactose intolerant and they talk about how great the flavors of the different cheeses are, and the boost that they give to the recipe, you just sort of lose interest. But for whatever reason I decided I was going to make it work with my ingredients, I was going to make it dairy free, and it was going to be excellent…I was right!

Uploaded from the Photobucket iPhone App

Los Ingredientes

  • Round loaf of bread (I find Sourdough works best)
  • 1 bottle of beer (We swear by Stella) (here’s a list of Gluten Free Beer to use instead. Note that I have not tried these, but have friends who drink Redbridge)
  • 1 pkg Daiya Mozzarella Style Shreds (amazing dairy free cheese, best I’ve found)
  • 1/2 yellow pepper
  • 4-6 mushrooms
  • 1/2 medium sized onion
  • roughly 4 cups of chopped spinach
  • 2 tablespoons flour
  • Salt
  • Pepper
  • Sea Salt & Herbs

Before I get into this, I have to expand on the Sea Salt & Herbs as it can be found in almost every recipe I make. It’s a mixture of, you guessed it, sea salt & herbs that can be purchased at the Bridgewater Farm Market from Rumtopf Farm for $5 a bag. If you live in my general area I strongly suggest picking up a bag and trying it for yourself. I barely make a meal without it.

First thing’s first, put your cheese in a bowl with the 2 tablespoons of flour and mix to make sure its all coated so they don’t clump together and put it to the side.

Next, take a bread knife and cut the top inch or so off the top of the loaf of bread and, taking a paring knife, cut out the inside of the loaf, leaving about an inch the whole way around. Scoop out the bread from inside the loaf as you would a pumpkin when making a Jack-O-Lantern and chop them up into little cubes doing the same with the top you cut off earlier. Spread them out on a baking sheet and drizzle olive oil, along with salt & pepper over top and mix to make sure they are all coated. Make room for the newly formed bread bowl and put them all in the oven at 350 for 5 minutes. Afterwards, take your cubes and put them on a plate, or tray, or in a basket if you’d prefer but keep the bread bowl on the pan, you’ll need it again .

While all this is going on you can fry up the yellow pepper, mushroom, and onion in a frying pan with a bit of olive oil and whichever spices you prefer. Keep it at a low heat, you won’t need them until after the spinach goes in with the beer & cheese.

In a pot, bring the beer to a very warm temperature without bringing it to a boil and add in the cheese. This will take longer with the dairy free cheese than normal cheese just because it’s a different consistency. Add in the Sea Salt & Herbs, or your go to seasoning, and with a wooden spoon keep mixing it slowly until it becomes completely melted, then comes the audience participation. Get the person who’s been standing there holding up the counter while you’ve been working to slowly add the spinach to the pot while you keep stirring.

Now is the moment you’ve been waiting for since I mentioned it, I know you have! The veggies you fried up earlier can now be added into the pot too! Once it’s all had a chance to get properly acquainted, take the contents and pour it into your bread bowl. Then it’s back into the oven for another 15 minutes, still at 350, and you can dig in and enjoy.

Remember, if you run out of the cubes, you can always start ripping the bowl apart!

Uploaded from the Photobucket iPhone App

Be sure to check out the other recipes on the blog too, as all of them are dairy free! =)

PS – If you want to make this more of a meal, you can always fry up some ground chicken or turkey, or stick with the veggie theme and double up on the mushrooms. peppers, and onion. Zucchini is also a nice addition =)

All happiness depends on a leisurely breakfast. – John Gunther

Due to seemingly VERY popular demand, I’m going to jump ahead a recipe or two and give you, loyal readers, my newest creation…Breakfast Pizza!

Uploaded from the Photobucket iPhone App

This one came about very abruptly. Basically while frying up omelet innards I remembered that the pan was oven safe up to 400F, so rather than make an omelet as I had planned I decided to see what would happen if I poured the egg into the pan and baked it. It was a definite success and took about 30 minutes total from prep to table.

The Insides

  • Mushrooms
  • Chicken Bacon
  • Garlic
  • Sea Salt  & Herbs
  • Daiya Dairy Free Cheese
  • Green Onions
  • Eggs (obviously)

Now this is a recipe where the amounts are entirely up to you, mine was made in a 12 inch pan so I had a bit more room to roam. As the picture shows, it made 8 good sized pieces. All that needs doing is the frying of your veggies and the scrambling of your eggs in a separate bowl. I personally leave the green onions out and sprinkle them over the top as I find it allows for more flavour from them. So, fry up the garlic, mushrooms, and chicken bacon (we diced ours) in the pan, and once they get to your desired level of doneness (totally a word), pour on the egg, toss the cheese on top and put it in your oven which has been preheated to 350 for 15 minutes.

These next 15 minutes are crucial, these were a gift handed down to you by the Gods of Breakfast Prep, you have your meal in the oven and nothing else to do. This is the time given to you to clean up your dishes (5-7 minutes tops) and then sit down with your cup of coffee/tea/milk/BBOC (Breakfast Beverage Of Choice) and wait for the timer to let you know that breakfast is served. My pan is non stick so after I took it out of the oven, I just slid it right out of the pan and onto the cutting board with ease, divided it up, plated it, and sprinkled on the green onion.

That’s all there is to it, ladies and gentlefolk.

Uploaded from the Photobucket iPhone App

Enjoy, and as always, let me know how it turns out/any tweaks you made to the recipe =)

We’re like, in the end of “Die Hard” right now, only it’s our actual life! – Schmidt (21 Jump St)

To the answer the question you’ve all been asking, No, I haven’t forgotten about you. Not a day went by that I didn’t think “I wonder how those people who read about my life are getting on without me?” The answer to that query can be found below when you write a comment about how you’ve been doing since I skived off.

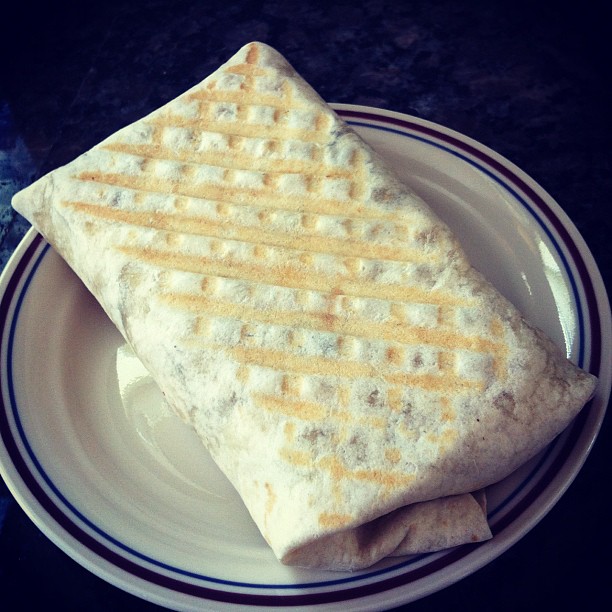
The past post was about a chicken cordon bleu roll-up, which was superb, but it was also eaten far too quickly to take pictures of. I switched out the ham that normally goes inside with fried onion and mushroom, and the pre-bread crumb dredge consisted of egg, almond milk, and dijon mustard. I’ll post the complete recipe in an hour or so when I get my computer back.

Two friends have come to visit from Vancouver for 2.5 weeks and since it is only 5:34AM Vancouver time, they are still asleep.

I obviously have some catching up to do, which means I’ll obviously miss some things and post them as I remember.

The Highlights:

It’s become far too hot for my morning coffee which saddens me, and I don’t always feel like making iced coffee so, I finally tried something that I’d been working on in my brainpan for a long while…I made coffee popsicles. But not just normal run of the mill popsicles because I knew it needed something sweet so they weren’t bitter. I took some popsicle moulds (I got mine at the dollar store) and poured a little bit of Hazelnut flavour syrup in the bottom, a little more than it takes to cover the bottom, and then filled the rest with coffee that I let cool down so it was warm, but not cold. The reason for this is I feel that once coffee gets completely cold, the taste changes and it can be rather unpleasant, so a little bit warmer than room temp is your goal, folks.

This was the result:

Photobucket

I understand that coffee is not for everyone, and I also get where the coffee purists, snobs, are coming from as well with the mindset of “coffee should only be drank hot, and black!” That is all well and good, but in the dead heat of summer, I will take a coffee popsicle over a steaming cup of joe any day. I was even able to get my dad to try one and he really liked it, which surprised me because, other than milk, he doesn’t like much done to his coffee.

HERITAGE PARTY!

my good friend Ashton threw the First Annual Heritage Party on Saturday and I have to say, it was a lot of fun. We had a pot luck of Canadian dishes, and we had 5-6 people who were not from Canada so it was all new to them. Of course poutine was on the menu and, being lactose intolerant, I made my own version and brought it with me. It’s a very simple tweak on the normal recipe but at the same time quite different. (again, no picture, I’m sorry)

Rather than just bake the fries, I put some EVOO in my copper bottom frying pan and put it on low. Once it got up to temp, I threw in the fries and got them coated and let them cook for about five minutes, I then threw in my new culinary weapon…

Photobucket

it’s great on everything, and it’s the perfect pick me up for fries without getting into prepackaged seasonings, not that there’s anything wrong with them, they just aren’t for me. I get this at the local farm market, and it is one of my culinary staples.

BACK TO POUTINE!

I kept the temp low and let the herbs imprint themselves on each and every fry, once they were about 5 minutes from being done, I went to work on the gravy. I didn’t make it from scratch, I used a can of heinz mushroom gravy, but I love the taste and a lot of people were very surprised it came from a can. Once again I used Daiya Dairy Free cheese and, since we live about 20 minutes away from Ashton’s, I mixed it all together in a casserole dish, covered it in tin foil and we were off. By sealing it all in, and reheating it later to eat, it became a poutine casserole and I got a lot of compliments on it.

When you’re a person with many dietary restrictions, it always feel good when people who have the option of eating “normally” and still choose your dish.

After the pot luck we all went into the barn where the screen was set up to get to the main reason we were all there, watching all 74 Heritage Minutes and having a Canadian Trivia night to prep for Canada Day, but also to prep those non-Canadians with the knowledge needed to make the transition. Important things like Great Big Sea, Stompin’ Tom, Alanis, Donairs and Dulce.

It was an excellent night and our team ALMOST won the much coveted Golden Inuk Shuk, hopefully the people will still know we were there.

Ok Emily, as promised, the recipe for Any Meal CasSurreal.

Yes, I had posted it before, but I’ve made several tweaks to it since then, and I believe I’ve got the best recipe/system for this beast. The reason it’s called the Any Meal CasSurreal is because it can be eaten at any meal because of the assortment of ingredients, and the bread that is on top, loses it’s “breadiness” through the egg wash and the cooking, kind of like french toast, which is where the surreal portion comes from. You want proof it can be eaten for any meal, you say? Fair enough, when I made it a few days ago, I realized around 10PM that I did, in fact, eat it for every meal.

You can put almost anything IN this dish, my staples are onion, green onion, mushroom, and a coloured pepper (normally red). The amounts also vary depending on how much variety you’d like your CasSurreal to have.

General rule of thumb is as follows:

8×8 pan

1/2 onion

1/2 pepper

3-4 mushrooms

1-2 stalks of green onion

This dish is also a good way to make use of last night’s leftovers. There was some chicken from supper that had been BBQ’d so I diced it up. I noticed it was kind of dry so I used science to rectify the situation. If mushrooms release a fair amount of liquid while cooking, and chicken tends to absorb the flavours of what it’s cooked with, then combining them in the pan should do the trick. I cooked the veggies at a low heat, onions and peppers first, and once I saw some colour on the onion, tossed in the chicken, let them mingle just enough for the chicken to take on some of the pepper’s red tinge and tossed in the mushrooms, mixed them all around and let them sit for a bit, letting it all cook down. The result was very moist chicken, and somewhere a Science teacher, who I told I’d never use anything he taught me, smiled to himself.

Once the veggies are all cooked place them in your 8×8 pan, now comes the egg and bread portion.

bowl

wax paper

8-9 eggs

4-5 slices of sourdough

small circular cookie cutter

sea salt and herbs

place a sheet of wax paper on the counter, big enough to rest 12-13 circles of sourdough and crack 7 eggs in your bowl. Add as much sea salt and herbs  as you wish to the eggs and beat the ever loving crap out of them. Once they are well mixed, start cutting circles out of your sourdough, the number of circles is entirely up to you. I tend to use 12 and place 3 rows of 4 across the top of the casserole, this makes it easier to cut as you can use the circles as indicators of portion size. For the sake of being artsy fartsy I used 13 today just to make a design, this is also completely acceptable as you’re the one you need to impress, I unfortunately can’t come over.

Once your sourdough is circled, take 3 at a time and place them in the bowl of egg and push them to the bottom, once they float back to the top, take them out of the bowl and place them on your wax paper.

Photobucket

Now that they are all eggy and wonderful, pour the rest of your egg into the pan with your veg. This will ALMOST cover it, but not quite. Which is where the other two eggs you were wondering about come into play. Crack them into the bowl, whip ’em up, and toss them into the pan as well. Then it’s back to your handy dandy SS&H, henceforth this means Sea Salt & Herbs, it’s too long to keep typing haha. Sprinkle it across the top of the egg and veg, and them mix it all together so that it’s all laying somewhat evenly in the pan. Then comes the fun part, placing or tossing the bread circles on top o’ the feast.

Photobucket

At some point during this burst of creative energy, you’ll want to set your oven to 350 degrees. I usually start getting mine to temp around the time I start dredging the bread. Now all you need to do is cheese your CasSurreal. As I mentioned before, I’m lactose intolerant, I use Daiya Dairy Free cheese which is soy, gluten, and dairy free and is tapioca based. It melts like cheese and tastes like cheese. It’s the only non dairy alternative that does cheese any justice. For those willing to give it a try, this is what you’re looking for.

Uploaded from the Photobucket iPhone App

so what goes into the oven will look like this –

Photobucket

and will come out looking like this –

Photobucket

Hope you enjoy your Any Meal CasSurreal!

Let me know how yours turns out =)

in closing, I didn’t want a Grad Ring from NSCC, these are my Grad Chucks, designed by me. What better way to graduate from Business Admin – Marketing Concentration =P

Photobucket

Uploaded from the Photobucket iPhone App

You keep eating your hand and you’re not gonna be hungry for lunch… – John Bender

Today is the day I finally get caught up on The Voice AU. I’ve loved it since the beginning and while I love the American version, and the performers/coaches I must say I think, as a show/competition, I prefer the Australian as it seems a lot more raw.

That’s not to say I don’t still listen to Jamar, Lindsey, Juliet, Jamie, The Shields Brothers and the rest of the pack because I do, and have purchased all I could on Itunes. But I find, as with most Americanized competitions, it very quickly becomes a matter of who will get the highest ratings rather than who performs the best and I believe that Australia has got it figured out. As each round goes by, whether I like the decision or not, I know it’s the right move made by the coaches. There were countless decisions made on the US version, most of them “Xtina”‘s that made me question if I would tune in the following week.

If you get the chance, check out these amazing artists from both shows, because they will very quickly become your new faves

Now that I’ve lost some readers/insulted some people we’ll be moving right along.

When I bought my Panini Press a few years go, I found a way to use it for practically every meal and it lost some of the mystique that it held. As such, it became much less an appliance and much more a professional toe stubber.

Up until today I’ve been using it only as a glorified toaster for the past 12 months, today all that changed.

Image

I took all of this wonderful, some of it cooked, some raw and crunchy and turned it into this

Image

The Goods

1 tortilla

choice of spread

1-2 mushrooms, sliced

1 green onion, diced

deli meat of your choice and preferential amount, chopped

1 slice tomato, cubed

1-2 leaves of lettuce, chopped

1 slice cucumber, cubed

grated cheese

Put a little olive oil (butter if you prefer) in a pan on low to medium heat and toss in the mushroom.

Once the colour starts to change, throw in the green onion.

When it is almost cooked, add in the deli meat to brown it slightly and soak up the flavours.

cube and chop lettuce, tomato, and cucumber respectively

put spread of your choice of spread on tortilla.

add the ingredients from the pan to the tortilla, followed by the cold items and sprinkle cheese over top.

fold and grill, making sure to only grill until the marks are present otherwise your cold items lose their crunch.

Hopefully people are enjoying the recipes, as they are fairly low cost and can be done with a low skill set, something for everyone =)

If you keep reading them I’ll keep posting them.